Table of Contents
Updated on July 7, 2023, 6:50 p.m. (GMT+8): Added photos and improved relevancy based on the most recent Dota 2 patch notes.
Dota 2 is arguably the most in-depth and complex esports title — which can make watching professionals play it a bit difficult.
This is especially true for those who are unfamiliar with the game. This guide will help you understand and appreciate the nuance and beauty of watching Dota 2 being played at the highest level.
Here’s a quick rundown of what the game is all about:
Dota 2 is a game where two teams of five players are tasked with destroying the central structure in their enemy’s base, called the Ancient, while protecting their own. There are three main avenues leading to each base, called the lanes, that are protected by a line of towers and continually spawning waves of NPC units called creeps. The five players on each team are given control of a hero — each with its own unique set of attributes, abilities, strengths, and weaknesses — and they must team up to get strong enough to besiege the enemy base and take down their Ancient.
(Italicized terms that may be unfamiliar to beginners will be explained in the ‘What you need to know’ section in the latter half of the guide)
With that out of the way, allow us to breakdown all the important things you’ll be seeing in a broadcast of a professional Dota 2 match:
How Dota 2 esports matches work
The draft
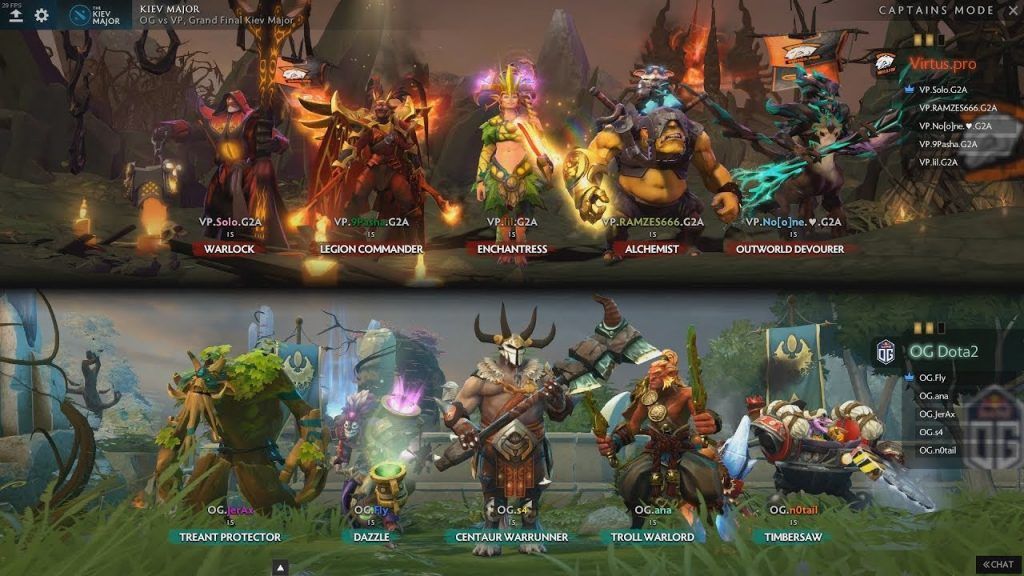
Every professional Dota 2 match is played in Captain’s Mode, which begins with the captains of both teams taking turns picking and banning heroes in a draft phase, hence the name.
In professional games, one team chooses which side they start with, Radiant or Dire. The other team gets to choose first or second pick, which results in a different drafting order.
The draft will be where they decide which heroes they will play with. Teams alternate phases of bans and picks, with both teams building their lineups to either run a successful strategy, counter the enemy, get heroes they are comfortable playing, and so on.
While casual viewers can elect to skip watching the draft, seeing it unfold gives them a glimpse into the mind games that both teams play even before they start clashing. Of course, knowing how the picks and bans went down gives valuable context on whatever happens during the game itself.
The HUD
Each professional game of Dota 2 is spectated from the point of view of an independent observer, who controls the camera to show a particular part of the map for the audience to see during the broadcast.
Apart from what’s happening in the game itself, a ton of information about it can also be seen on the in-game HUD. Here’s a breakdown of the different elements in the HUD and what they tell the audience during a broadcast:
First, on the very top of the screen is a panel that shows the hero lineups of both teams, with Radiant on the left and Dire on the right.

You can see how much health and mana each hero in the game has underneath their respective portraits. There is also a green diamond in the middle of the HP bar that indicates whether a hero has their ultimate ability ready or not. If a hero’s diamond isn’t green, then that means their ultimate is on cooldown and cannot be used yet.
When a hero dies, their portrait becomes greyed out and a timer appears below it which shows the number of seconds it will take before that hero respawns.
In between the lineups for both teams is the in-game clock, which shows how long the game has been going for. Flanking the clock are the kill scores for both teams, which shows how many kills they have scored throughout the game. While the team that has the higher number of kills usually has the lead in the game, it’s not always the case. A better indicator of who holds the lead would be the icon that appears below a team’s kill score, which indicates how much of a gold lead they currently own.
On the sides of the clock are bars that indicate the scores for both teams in a match. Each bar starts greyed out in the first game of the match, with a bar lighting up to show how many games a team has won as the match goes on.
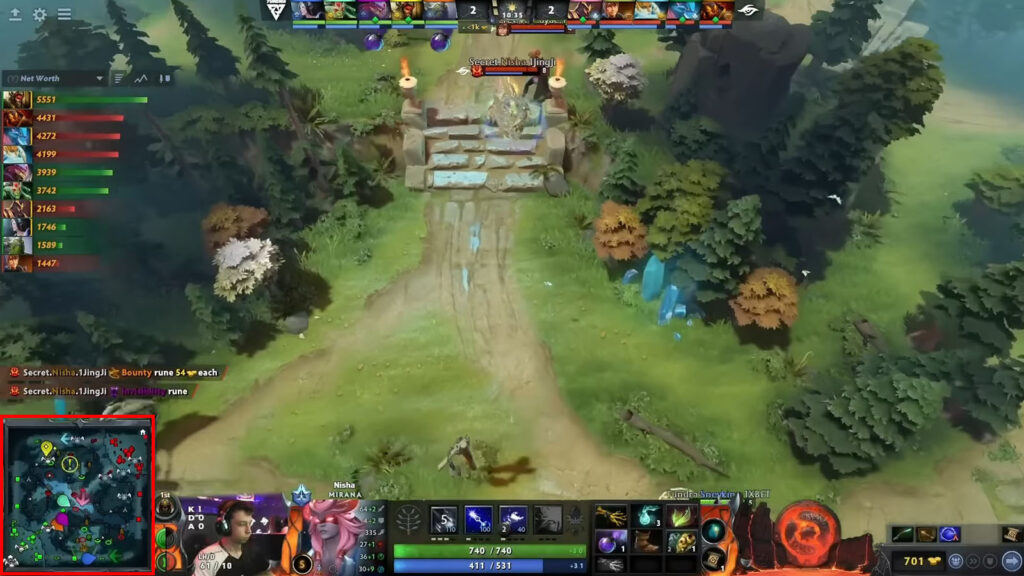
On the bottom left side of the screen is the minimap, which can give you an idea of what both teams are doing with a quick glance. The big dots indicate towers and buildings, with green ones belonging to the Radiant and red to the Dire. A hero’s position on the map is indicated by an icon that shows their face, with the outline’s color showing which team they belong to. The icons that look like a donkey’s face with wings on the side indicate the positions of player couriers.
On the right side of the minimap is a panel that shows whether Roshan is alive or how long it will take before he respawns, as well as which teams can use their Scan and Fortification abilities.
Next, on the bottom center of the screen is a panel that shows information about the hero or unit that the observer has selected.
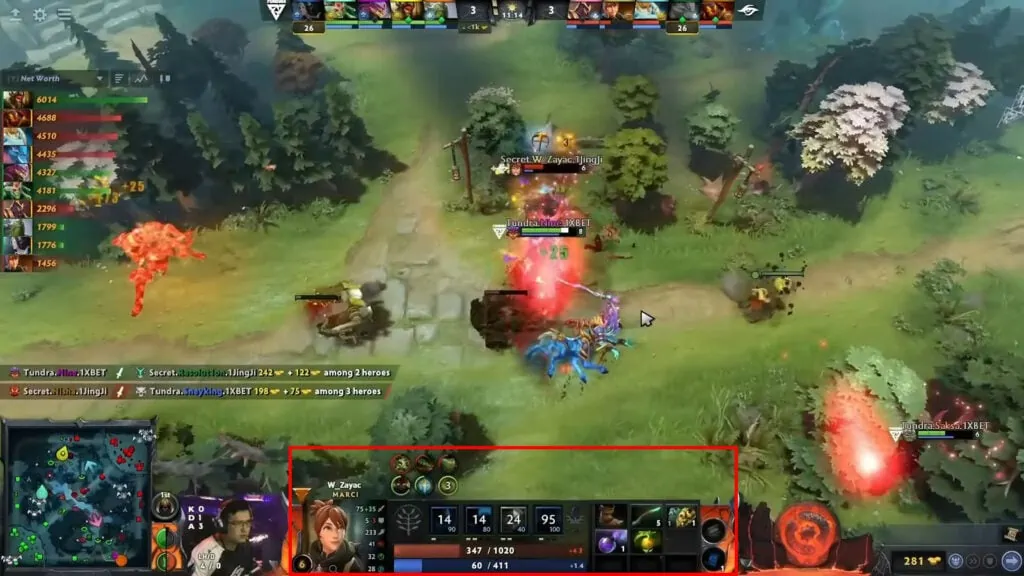
The selected hero’s portrait is shown on the left side of the panel, with their name above it. On the bottom left side of the hero portrait is an indicator of that hero’s level and their progression towards the next level. Further information about the selected hero, such as their damage, armor, movement and attack speed, attributes, and so on can be seen on the right side of the portrait.
In the middle of the hero panel are their health and mana bars, with exact values in the middle of each bar. Above the health bars are the icons for the hero’s abilities, with the rightmost icon indicating the hero’s ultimate. The ability icons will be greyed out when they haven’t been leveled yet and will be blued out when the hero doesn’t have enough mana to use it. Once a hero has used an ability, it will be greyed out and a number will be shown in the middle to indicate how long it will take before they can use it again. Between the hero portrait and ability icon is the hero talent tree, with each branch of the tree lighting up to show which talent a hero has chosen.
The right side of the hero panel shows a hero’s inventory and whatever items they contain. There are nine total slots in a hero’s inventory spread across three rows. The top and middle rows indicate their main inventory of active items while the bottom row indicates inactive items they have stored in their backpack. To the right of the hero inventory are separate slots for Neutral Items and Town Portal Scrolls.
Finally, on the left side of the screen is a drop-down panel that the observer uses to show important information about each hero over the course of the game. These are the three most common ones you will see:
Everything you need to know about Dota 2
There is a ton of information that a spectator needs to know in order to understand what’s happening in a game of Dota 2. Allow us to explain a bunch of the most important ones:
Meta/Metagame
The metagame in Dota 2 refers to the state of the game in terms of which heroes, items, or strategies are more powerful than the rest. The meta revolves around the periodic patches to the game, which add or change heroes, items, and other game mechanics in an attempt to balance it as much as possible.
Of course, no real balance can ever be achieved, but suffice to say, teams will try and play whichever hero or strategy is ‘in the meta’ to give them the best chances at achieving victory.
Hero roles/positions
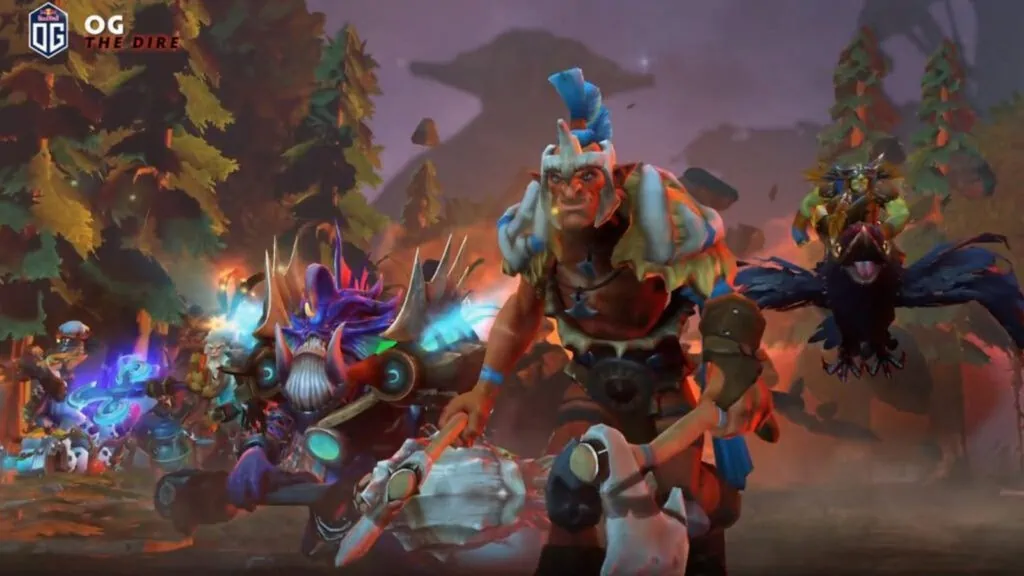
Each professional team in Dota 2 is comprised of five distinct roles or positions determined by how much of the team’s resources will be given to each player.
While these roles are not set in stone and each team has their own spin on how they play them, these are the five roles in Dota 2: Carry (position 1), Midlaner (position 2), Offlaner (position 3), Soft Support (position 4), and Hard Support (position 5).
The carry, midlaner, and offlaner are collectively referred to as ‘cores,’ since they use up a majority of the team’s resources and are usually the main driving forces in their team’s strategy. Meanwhile, the two supports don’t need to use up much of the team’s resources to be effective and are, as such, generally the playmakers and enablers for their team’s core heroes.
While all of Dota 2’s heroes can be played in any position, they are usually most effective in one or two roles. Some heroes are versatile, however, and they are often valued by teams during the draft.
Lanes
The role of a particular hero will generally decide which lane they start the game in. The midlaners, as their name implies, take the midlane. The carries take the safe lane, which is bottom lane for Radiant and top lane for Dire. The offlaners take the offlane, which refers to the harder or more unsafe lane, which is top lane for Radiant and bottom lane for Dire.
Meanwhile, which lane the supports go to will depend on their team’s strategy. Sometimes teams will run a strategy where their victory is entirely reliant on the carry, in which case they will have both supports accompany him in a tri lane. With that said, the general laning setup in pro games will have one support each accompanying the carry and the offlaner.
Couriers
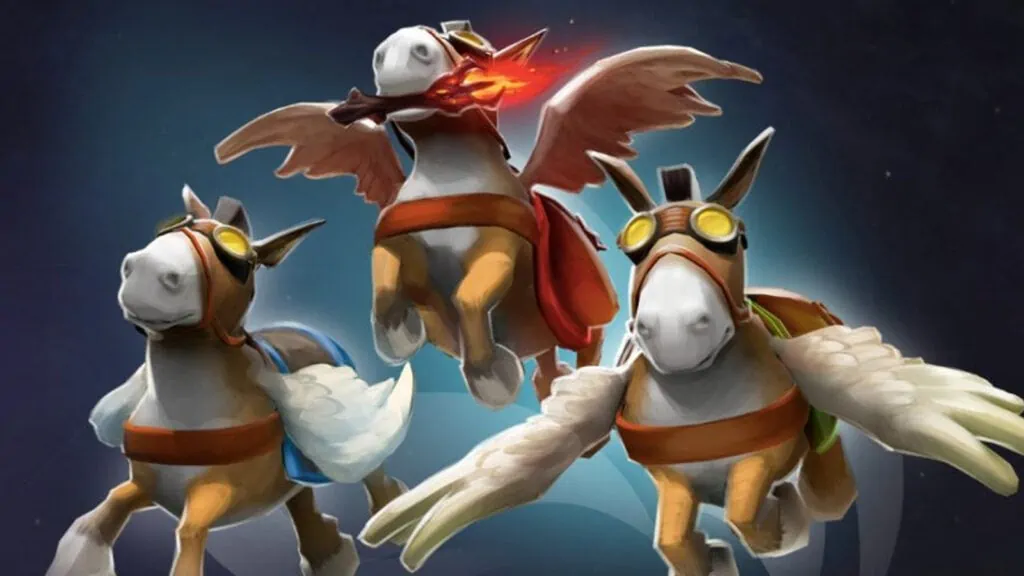
Each hero is given their own courier, which they use to ferry items from their base to wherever they are on the map. Couriers start off as a slowly-walking unit, but they will turn into a faster, flying form once their owner reaches Level 4.
Killing a courier gives a significant bounty while also making life a bit harder for its owner, so it’s not uncommon to see heroes go to great lengths to take down a wayward courier. While a courier will respawn after a set time when it’s killed, the respawn timer gets longer as its owner levels up.
Towers and Barracks
Every lane for each side is fortified with three tiers of towers that progressively get stronger the closer they are to a team’s base, as well as a set of barracks, often shortened as ‘rax.’
The tier one tower is located at the end of each lane near the point where the opposing creep waves meet, the tier two tower is at the halfway point of each lane, while the tier three tower is located above each ramp leading into a team’s base. There is also the fourth tier of two towers that protect each team’s Ancient.
Towers grant bonus armor to nearby heroes and can also detect nearby invisible units. The second tier of towers and onwards are invulnerable until the tower in the previous tier has been destroyed.
Meanwhile, barracks are buildings that, when destroyed, will make the opposing creeps in that lane stronger. There are two kinds of barracks, the melee and the ranged, corresponding to the first two types of lane creeps.
The Melee Barracks is more robust and is able to slowly regenerate its health, while the Ranged Barracks is easier to take down and has no health regeneration. Barracks are invulnerable until the tier three tower guarding them is destroyed.
The Glyph of Fortification, also referred to as ‘fort’ or ‘glyph’ in short, is an ability usable by any player that causes all friendly buildings and lane creeps to become impervious to damage for a short duration. It also grants tier two and higher towers the ability to attack multiple enemies at the same time to help defend against enemies. This effect has a low duration compared to its very high cooldown, so timing its usage right is very important.
Lane Creeps
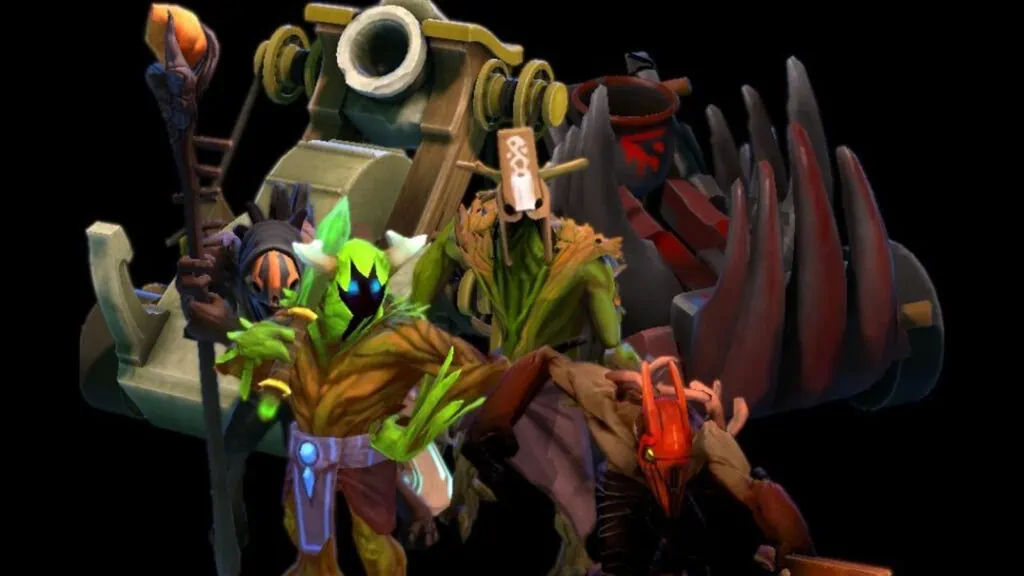
Lane Creeps are the first of two types of creeps in Dota 2. A group or wave of Lane Creeps spawns in each lane every 30 seconds that will advance through their lane and attack the opposing creep wave, tower, or hero.
There are four types of lane creeps: Melee, Flagbearer, Ranged, and Siege:
Melee creeps spawn in larger numbers and have more health and less damage than ranged creeps. A variant of a melee creep exists, called the Flagbearer, which replaces a melee creep after five waves, then every two waves thereafter. They are tankier and grant extra gold in an area.
Ranged creeps have lower health, but deal more damage and are able to attack from a distance. Siege creeps, also referred to as catapults, spawn in every tenth wave and have a lot of health and, unlike other lane creeps, high magic resistance. They also have a ranged attack that deals significantly more damage against towers and buildings, which they prioritize attacking over other units.
A wave of creeps start out with three melee creeps and one ranged creep. Once the game hits the 15-minute mark, each creep wave gets an additional melee creep. More creeps are added to each wave at every 15-minute interval until the 45-minute mark, at which point and onwards each wave has six melee creeps and two ranged creeps.
Destroying either of the enemy team’s Melee or Ranged Barracks causes the destroying team’s respective lane to begin spawning super creeps, which are stronger versions of regular lane creeps. Once all enemy barracks are destroyed, however, a much stronger version of lane creeps called Mega Creeps will begin to spawn from all of the destroying team’s lanes.
Neutral Creeps
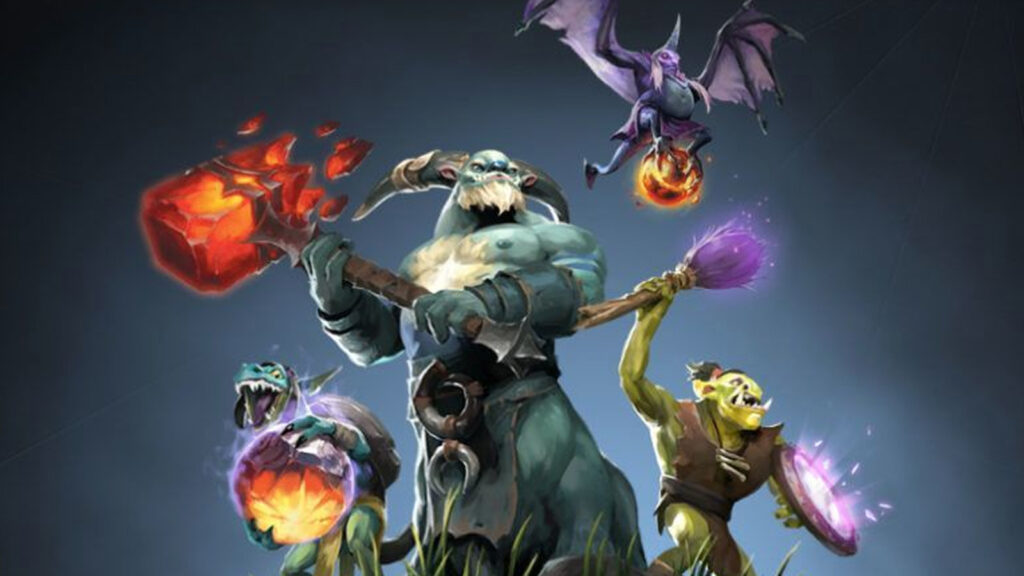
Located in between the lanes are areas collectively referred to as the ‘Jungle.’ Occupying the vast expanse of the Dota 2 jungle are Neutral Creeps (sometimes referred to as Jungle Creeps), the second type of Creep in the game. Unlike Lane Creeps, Neutral Creeps are not aligned with either Radiant nor Dire and will attack any unit or hero that strays into their lairs.
There are four kinds of Neutral Creeps, with each spawning in their own specific spots in the jungle. These Neutral Creep camps are categorized into Small, Medium, Large and Ancient creep camps. Neutral Creeps primarily provide another source of gold and experience aside from Lane Creeps and heroes, though they can also be controlled by heroes like Chen and Enchantress, or by the Helm of the Dominator item, to bolster their team’s forces.
Neutral Creep camps start spawning at 01:00 and then spawn every minute thereafter if there are no units occupying the camp. Because of this interaction, you can ‘stack’ Neutral Creep camps by luring the creeps away from the area of the camp so that a new group spawns. This tactic is used to help heroes earn a lot of gold and experience quickly.
In addition to giving away gold and experience, heroes also have a chance to get Neutral Tokens — which can then be converted to items — by taking down Neutral Creeps. Neutral Items come in five tiers, can only be acquired from Neutral Creeps, and cannot be sold.
Neutral Items grant a variety of bonuses or abilities to whoever holds them, with the strength of each item increasing the higher its tier. Each tier can only be acquired during specific time periods in the game. Tier One Neutral Items only start dropping at the seven-minute mark, with the next three tiers dropping after every 10-minute interval. The last tier of items can only be acquired once the game reaches over an hour.
Last Hitting, Denying, and Farming
Both teams will spend much of the early game trying to get as many Last Hits and Denies on Lane Creeps. Getting the Last Hit refers to landing the killing blow on an enemy creep to get the gold bounty from it, though the experience from it will be granted to all opposing heroes in the vicinity. On the other hand, getting a Deny refers to landing the killing blow on an allied creep so that enemy heroes can’t get the gold bounty from it on top of receiving less experience than normal. Players can also deny towers, buildings, or even allied heroes to ensure that the enemy team won’t get the full bounty from taking them down.
Another commonly used term is Farming, which refers to the act of last hitting as many creeps as possible to earn a lot of gold and experience. Core heroes, especially carries, will spend much of the game farming, as they need a lot of levels and items in order to be effective.
On the other hand, supports will usually spend much of the early game denying farm from opposing core heroes and accelerating their own carry’s farm by stacking Neutral Creep camps. Supports usually earn their farm from kills or assists, defending their towers from lane creeps, or taking farm from the lane once the carries have moved to the jungle to farm neutral creeps.
Ganking
While both teams will engage in titanic clashes over objectives or in base sieges, much of the action in a game of Dota 2 is in the form of smaller engagements called ‘Ganks.’ These Ganks usually involve one to three heroes mobilizing to kill an enemy hero or two in order to make it easier to take an objective or besiege the enemy base.
Midlaners, Offlaners, and Supports are usually the ones to initiate ganks, with Carries often being the prime target in order to slow down their farm.
Teams will often make ganking easier by using an item called Smoke of Deceit, which makes all heroes in an area around its user invisible for a short time or until they get near an enemy hero or tower. Smoke of Deceit is especially useful because it makes a ganking team undetectable by the items teams use to protect themselves from ganks called…
Wards
Wards are items that, when planted, grant vision over an area of the map. There are two kinds of wards, Observer Wards and Sentry Wards, both of which are normally invisible to enemies.
Observer Wards grant vision over a huge area, though its vision can be obstructed by trees and other line of sight modifiers. Because of this, they are usually placed on high ground where they can provide an unobstructed view of an area.
On the other hand, Sentry Wards provide True Sight in an area, which allows them to detect invisible units and other wards. Sentry Wards do not provide normal vision by themselves, however, so they are usually placed near an Observer Ward.
The job of getting and planting wards usually fall on the team’s supports. While Observer Wards are free of charge, Sentry Wards cost 50 gold. Wards can also be used to block Neutral Creep camps from spawning by planting them on the spawn box of the camp.
Dust and Gem
Sentry Wards are not the only items to provide True Sight. Invisible enemies can also be detected by using Dust of Appearance or Gem of True Sight.
When used, the Dust of Appearance reveals all invisible units in an area when it is used, while also slowing their movement. Meanwhile, the Gem of True Sight detects allows its wielder to see any nearby invisible units or wards, though it drops from its wielder’s inventory if they die.
Teams usually buy a Gem of True Sight if they are in the lead to limit the enemy team’s vision by taking down any wards they have on the map. There is a bit of risk that comes with purchasing the Gem, since it drops upon death and supports are usually the ones with space in their inventories to carry them.
Dust of Appearance is a less costly way of detecting invisible enemies. However, its user must first be aware that there is an invisible enemy nearby before they use it, since the item can only be used once. Dust of Appearance can be stacked multiple times in one inventory slot, however, so you will often see supports carrying a lot of the item when up against enemy heroes that rely on invisibility.
TP
TP refers to the Town Portal Scroll, one of the most important items in the game. The item allows its user to teleport to any allied tower, building, or Outpost. It takes some time to complete the teleport, however, so a hero using the item can be stopped from completing it with a stun.
All players start the game with one Town Portal Scrolls, though they start on a 100-second cooldown so they cannot be used right away. The item is cheap and has its own dedicated slot in the inventory, so it’s costly to be caught without one.
The Town Portal Scroll can be upgraded by purchasing the Boots of Travel item, which allows its wielder to teleport to allied units and heroes, not just towers, buildings, or Outposts.
Hero Talents
Talents are traits unique to each hero that can be learned on top of their basic abilities and ultimates. They can be learned starting at Levels 10, 15, 20, and 25.
Talents can be chosen from a Talent Tree that offers a permanent choice between two distinct bonuses, which include bonuses to attributes and boosts to abilities. Once a talent is chosen, its counterpart is discarded and the selected bonus is gained for the remainder of the match. However, if a hero was able to reach Level 30, then all their talents are automatically learned.
Roshan
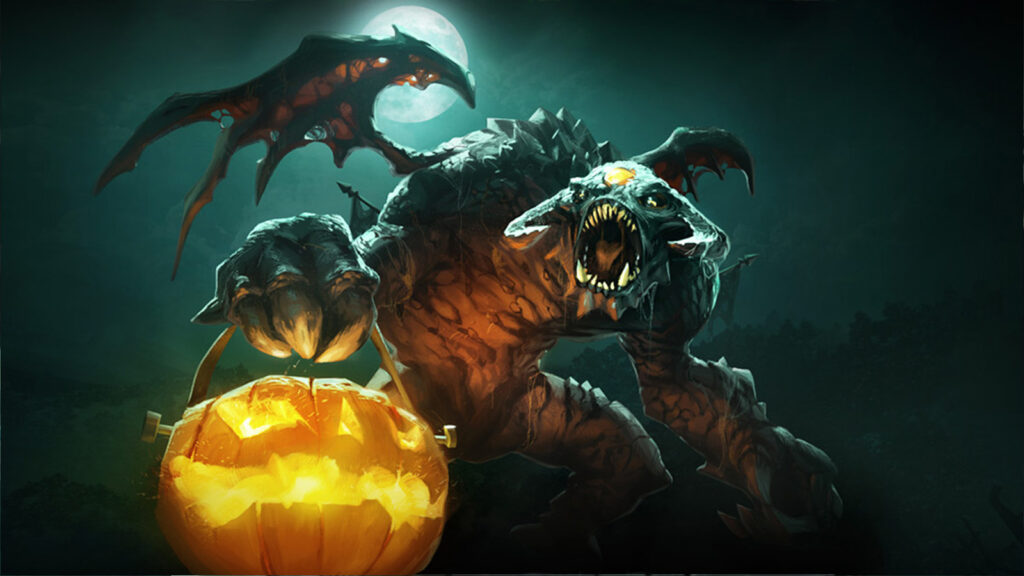
Roshan the Immortal is the most powerful neutral creep in Dota 2. He can appear in two locations, depending on the in-game time of day. — in pits to the extreme northwest (night) and southeast (day) of the map.
Roshan is not a creep that can just be farmed like the other neutral creep camps. He usually outclasses any hero one-on-one during the early to midgame. It usually takes an entire team to bring down Roshan, as any attempt to take him on needs the correct timing and approach, since it is one of the major deciding factors for its rewards.
Roshan gets stronger the longer the game goes on and respawns every time he is slain. When he is killed, he respawns after a random time between 8–11 minutes. Unlike with other neutral creeps, the respawn cannot be prevented by any means. Players also do not get any indicator for when exactly he respawns, though the spectators and casters can see a clock at his pit that shows the exact time left before he respawns, which is not until five minutes after he was slain.
A team who can successfully take down Roshan not only earns a sizable bounty of gold and experience, but also a variety of items. The first is the Aegis of the Immortal, which is dropped every time Roshan is slain. Whoever holds the Aegis will come back to life with full health and mana once they are killed, though Roshan will reclaim it once he respawns.
Upon Roshan’s second death, heroes get a free Cheese, an item that instantly restores a large amount of health and mana. On the third death, players will get either the Refresher Shard or Aghanim’s Blessing. When killing Roshan in his southeast pit, he drops the Blessing. When killing Roshan in his northwest pit, he drops the Refresher Shard.
The Refresher Shard can be consumed to restore the cooldowns of all abilities and items of its user. Meanwhile, the Aghanim’s Blessing can be picked up to buff the abilities of whoever takes it similar to the effect of the Aghanim’s Scepter item.
Aghanim’s Scepter
The Aghanim’s Scepter is a powerful item that gives its wielder unique enhancements to their abilities, and sometimes even grants a new ability altogether. The item is a must-have for some heroes, as it really boosts their effectiveness. For most heroes, it’s a late-game pick-up to boost their abilities.
Aghanim’s Scepter can also be turned into the Aghanim’s Blessing and consumed so that it permanently gives its ability upgrades without taking up a slot in its wielder’s inventory. This is most often acquired through Roshan, though it is common in ultra-late game situations when item slots become increasingly valuable.
Aghanim’s Shard
The Aghanim’s Shard grants its user ability upgrades to a lesser degree, compared to its counterpart, the Aghanim’s Scepter.
The item grants each hero a unique enhancement to their abilities, or sometimes even grants them a new ability altogether.
BKB
The term ‘BKB’ refers to the item Black King Bar, which temporarily gives its wielder Debuff Immunity when used. The item is a must-have for many heroes, who can use the time they are immune to spells to wreak havoc on the enemy team. Some spells, like Beastmaster’s Primal Roar ultimate, can pierce through Debuff Immunity, however.
Players must be mindful of when they use Black King Bar, however, as the duration of its Debuff Immunity decreases with each successive use. The item starts out giving its wielder nine seconds of Debuff Immunity, after which the duration decreases with each use until it only lasts for six seconds, at the time of writing. The item is contentiously powerful, however, and will often receive tweaks to its timing in different patches.
Outposts
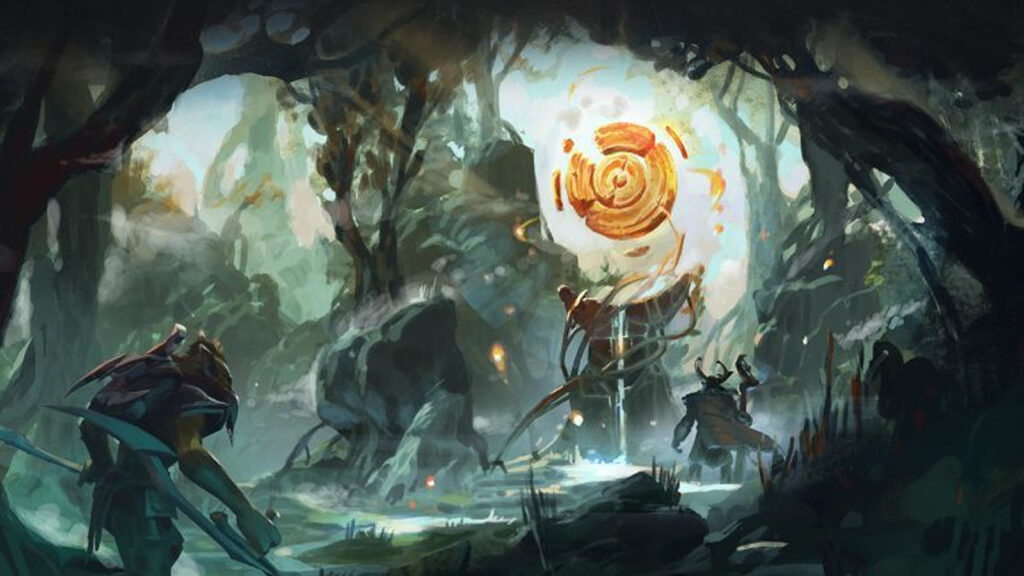
Outposts are an auxiliary objective that grants whichever team owns it periodic experience boosts, vision, and true sight over a small area, as well as a destination point for Town Portal Scrolls.
There are four Outposts on the map, two for each side. Two neutral outposts exist in each respective jungles. Meanwhile, the Radiant Outpost is southeast, near the bottom Roshan pit and Twin Gate, while the Dire Outpost is located to the northwest, near the top Roshan pit and Twin Gate.
Neutral outposts can be captured by the opposing team, though they must have destroyed at least one tier two tower before they are able to do so.
Twin Gates
Twin Gates allow any player and their units to go channel them, then appear on the opposite Gate. These Twin Gates are located at the two extreme northwest and southeast sides of the map.
Lotus Pools
Lotus Pool contain Healing Lotuses, which spawn every three minutes, that gives a boost to its user’s health and mana. Healing Lotuses can be stacked — three will make a Great Healing Lotus, then two Great Healing Lotuses make a Greater,
Tormentors
Tormentors are immovable, powerful neutrals that drop an Aghanim’s Shard upon defeat. These are located near each respective side’s base, in the northeast and southwest.
Though they cannot attack, they are equipped with shields that reflect damage back to any attackers — can potentially wipe out heroes if they are not careful.
Runes
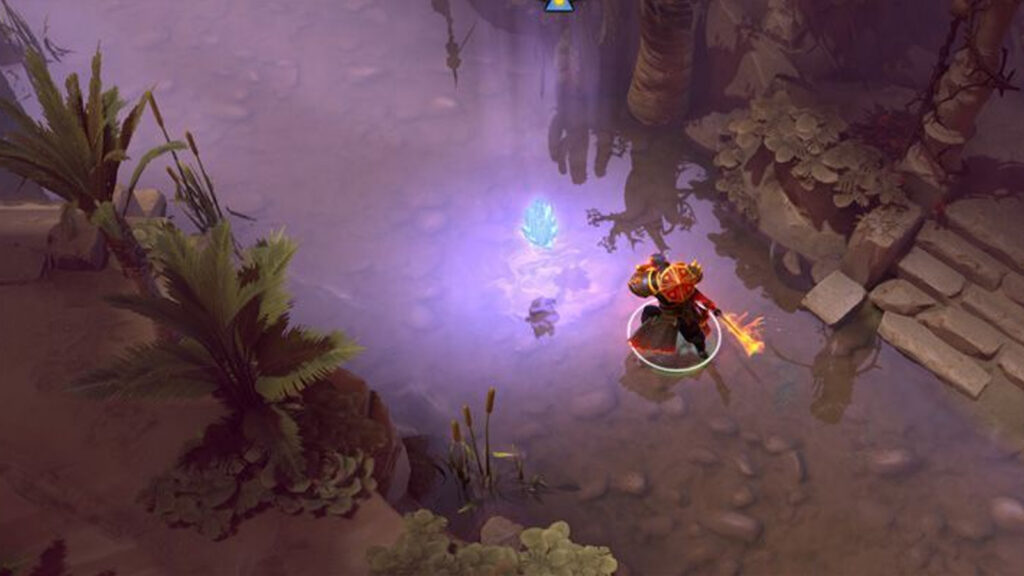
Runes are power-ups that provide bonuses to whoever picks them up. There are two kinds of runes, Power Runes, and Bounty Runes, with each appearing in different spots on the map.
Power Runes gives a variety of buffs to whichever hero picks it up and start spawning at the four-minute mark, then every two minutes after that. They can only spawn in one of two spots in the river that runs through the middle of the map. There are seven kinds of Power Runes; namely Arcane, Double Damage, Haste, Illusion, Invisibility, Regeneration, and Shield.
Meanwhile, Bounty Runes give gold to the team of whichever hero picks it up and start spawning at the start of each game, and every three minutes after that. They spawn at two locations on the map, one in each of the jungles of both teams.
Push
To ‘push’ refers to focusing on taking down an objective, such as a tower or barracks. While certain heroes have attributes or abilities that make them effective in taking down towers on their own, pushes are generally a concerted effort by an entire team.
There are many ways by which a push can be successful. However, it most often involves either taking down the objective with the help of a large wave of creeps or summoned units or killing the heroes defending it to make the push easier.
There are styles to pushing too. Split-pushing, also affectionately/derisively known as ‘Rat Dota,’ refers to using mobile heroes to avoid direct confrontations with the enemy team while picking off towers on the other side of the map. Meanwhile, a ‘Deathball’ push can refer to a team grouping up as five, along with a large wave of lane creeps as well as summoned units, to take down towers with brute force.
Status Effects
A number of hero abilities inflict a variety of status effects on their targets on top of damaging them. While there are a lot of different kinds of status effects in Dota 2, the most common ones are Stuns, Slows, Silences, Disarms, and Dispels.
Stuns fully disable an enemy, Slows slow down their movement or attack speed, Silences prevent them from casting spells, Disarms prevent them from attacking, while Dispels forcibly remove either positive or negative buffs and status effects.
Buyback
A dead player has the option to use buyback, which refers to spending gold in order to respawn instantly at their base, allowing them to rejoin their team to hopefully turn a losing fight around.
The gold cost for buyback scales as the game progresses, on top of its very long eight-minute cooldown. This makes it an incredibly valuable resource in the late game, as teams who lose multiple heroes who can’t buy back usually end up losing critical clashes and the game.
Divine Rapier
The Divine Rapier is one of the most powerful damage items in the game. At the cost of 5,600 gold, it gives its wielder 350 Attack Damage.
But for how powerful the Rapier is, it is seen as either the last resort for a desperate team or the deadlock breaker in an even game. This is because the Rapier drops once its wielder dies, which lets the opposing team steal it away to bolster their own inventory.
The item cannot be sold, backpacked, or destroyed, which will only increase the pressure and intensity of any pro game. If you see a Rapier being purchased in the game you’re watching, then you should be guaranteed to see an exciting end to it.
GG
‘GG’ means ‘good game,’ and is the sign of surrender in pro Dota 2. Once a team feels like they no longer have a chance at victory, they can type ‘gg’ into all chat to end the game without having to wait for their Ancient to be destroyed.
READ MORE: The 3 best Magnus counters in Dota 2


